
Tips, Tricks, and Skills
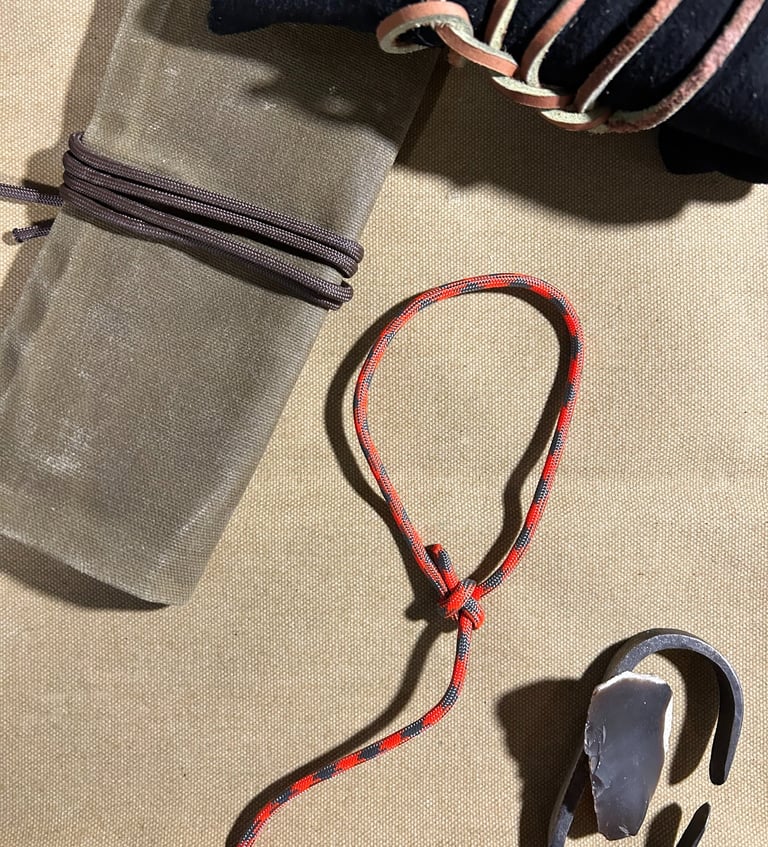
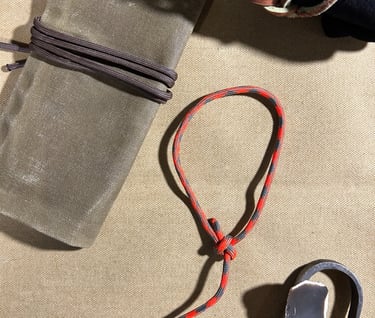
Knot of the 1/4 The Bowline knot is often touted as the "Grandfather of Knots" in the Bushcraft crowd that I tend to mingle with. "This is the most important knot that you will ever know!" was the phrase used to introduce it to me. Years later, I'm not 100% convinced that it is the "knot that all other knots are judged by" but, it is undoubtedly an incredibly important knot for every Bushcrafter, Survivalist, and Prepper to learn. The best way that I can verbally describe it is that, it is basically a "Loop" at the end of a "Line". The steps to fashion it are relatively easy to memorize and, once tied, it's versatility makes it a mainstay knot for numerous applications.
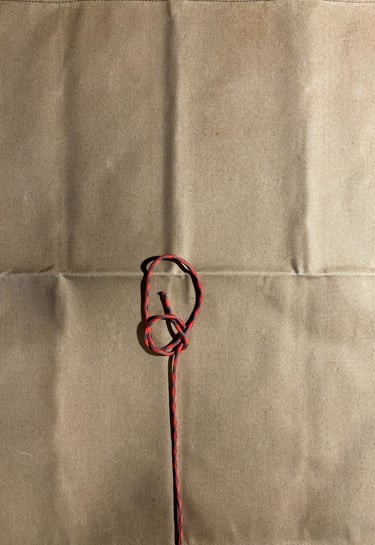
Step 1. Take the "Tag" end of your cordage and rotate it over the top of the "Main Line", leaving small "Loop" in the line.
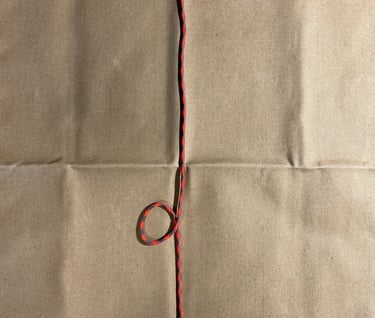
Step 2. Take the "Tag" end of your cordage and pass it through the small "Loop" from the underside, leaving a larger "Loop" at the top.
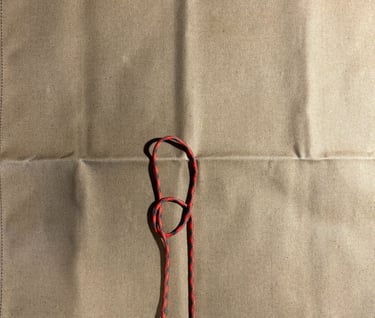
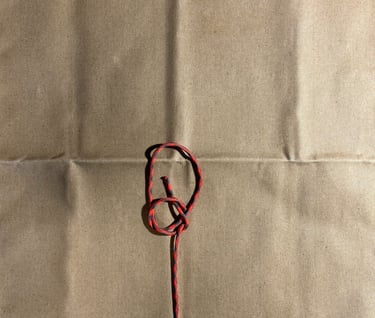
Step 3. Take the "Tag" end of your cordage and pass it under the "Main Line".
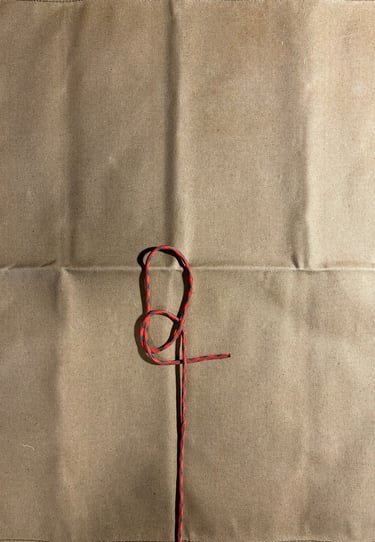
Step 4. Take the "Tag" end of your cordage and pass it over the "Main Line" and, back through the small "Loop".
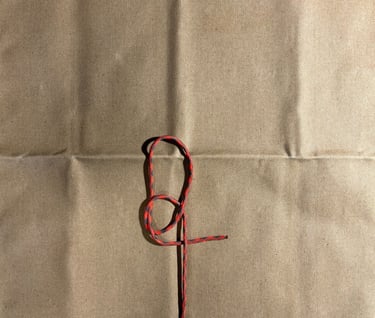
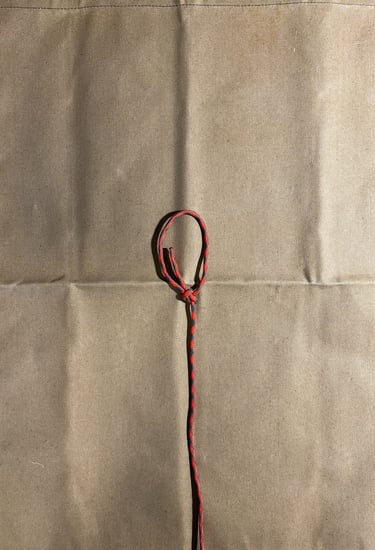
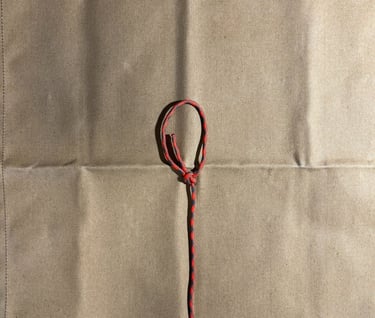
Step 5. Now simply "Dress" the knot by tightening it up neatly.
Practice this knot as often as it takes to master it and, I can assure you that you will find yourself using it on a regular basis whether it's around camp, at home, or at work. Once it becomes second nature, you'll have this knot in your skill set "Just in Case" you ever need it in an emergency!!
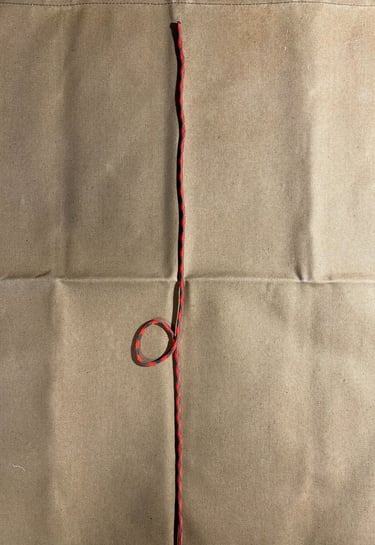
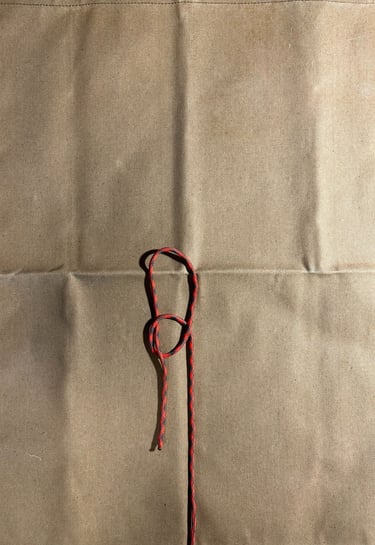
Step 1
Step 2
Step 3
Step 4
Step 5
Recipe of the 1/4:


Chili
Ingredients:
1 LB. Hamburger Meat (80%)
1 can of Canned Tomato's
2 cans of beans (your favorite kind will do)
2 packets of Chili Seasoning (any brand seems to work fine)
1/2 of a Red Onion
1/2 of a Green Bell Pepper
1/2 of a Yellow Bell Pepper
1/2 of a Red Bell Pepper
1 1/2 cups of Water
2 cups of Macaroni (optional)
Toppings:
Scallions
Shredded Cheddar Cheese
Salt and Pepper
Directions:
Chop up the Red Onion and, place it in a skilet, along with the thawed Hamburger. Place the skilet on your stove top and begin to fry the mixture. Once the Hamburger is "browned", place the mixture into a pot and, add in the rest of the ingredients (if you have elected to utilize the optional Macaroni, it needs to be cooked first, before adding it into the mixture). Add in a little additional water if you feel as though it is necessary. Bring the the contents of the pot to a boil then, reduce the heat, place a lid on the pot and, let the contents simmer for about a 1/2 of an hour (depending on your altitude). Remove the pot from the heat source and let the contents cool for a few minutes before serving. I prefer to enjoy this delicious meal by topping it with Scallions and Shredded Cheese. I'm also a "lite on the salt and heavy on the pepper" kind of a guy. This is one of those meals that is perfect for pre-cooking it and then placing it in your freezer the night before going camping. Once it is time to eat, simply get the campfire going, place the meal in a pot and, suspend it over the flames to warm it up!!!
Skill of the 1/4
Let's face it, one of the most important skills to solidify is Navigation. The truth is, you never know when you may need it. These days, having a GPS is clearly the most convenient way to get around town, the highways, or even the woods, but, unfortunately, most people have forgotten how (or never taken the time to learn how) to read a compass, find the North Star, or even how to get oriented with General Direction using the setting and/or rising sun. If you are a Bushcrafter, Survivalist, or a Prepper, you have either needed, or envisioned a scenario for when you would need, to know General Direction. There are certainly a multitude of ways to find General Direction and, most (if not all) will get discussed at some point on this website but, I think that this is one Tip that most people have not been introduced to yet and, could quite possibly save your life if; the Global Positioning System were inactive (or you simply didn't have a GPS on you), your compass was inoperable (or you simply didn't have one on you), it was dark (therefore you couldn't use the sun) and/or, you were experiencing foul weather conditions like fog (therefore you couldn't use the North Star). This may sound like a lot of "if's" but, as an example, I know that I've been out a lot of times without a GPS (even though I shouldn't admit it). I've certainly been out a night and, I can't even count how many times I've experienced inclement weather during those nights. Now then, just to be


fully transparent, I've never NEEDED to utilize this Tip (yet) but, it's uniqueness makes it a skill that I wont forget anytime soon.
First of all, most of us are aware that trees need a lot of things to grow. Some of these things are fertile soil, water, and SUNLIGHT. Now then, lets just say that most of you that are reading this article are living in the Northern Hemisphere. With that being the assumption, even though the sun rises in the east and, sets in the west, the location of the sun is always slightly to the south of us. This southern position is more pronounced in the wintertime and, can also be more noticeable the further north you are located. With that being said, it only stands to logic that, since trees need sunlight to grow and, the sun is predominately at a southern angle (to some degree), trees are going to be more apt to enjoy growth on the southern edge of the tree. We can visually observe this phenomenon by closely observing the "Rings" in the stump of a tree that has either been cut down previously or, we have cut down in an effort to find General Direction (I would only suggest intentionally cutting down a tree during an emergency situation). Referencing the photo above, you will notice that the top right side of the stump has its rings growing very close together, indicating that it has not grown well on that side. However, the bottom left side of the stump has the rings growing further apart, representing that the tree has experienced more growth on that side. Thus, we can conclude that south is towards the bottom left of the photo and, north is towards the top right of the photo. Again, this approach/application is merely a TIP for finding General Direction. If I were reduced to solely having this method at my disposal for navigating, I would attempt to check my direction of travel as frequently as possible and, with as many other means as possible (such as looking for moss on the north side of the same tree) in an effort to proceed as confidently as possible.
If you are ever in a wooded environment, you may very well come across an area where the Forest Service has cut down a volume of trees in an effort to mitigate fire dangers. Try setting your compass down on some of the remaining stumps and, see for yourself how reliable this Tip can be!!!